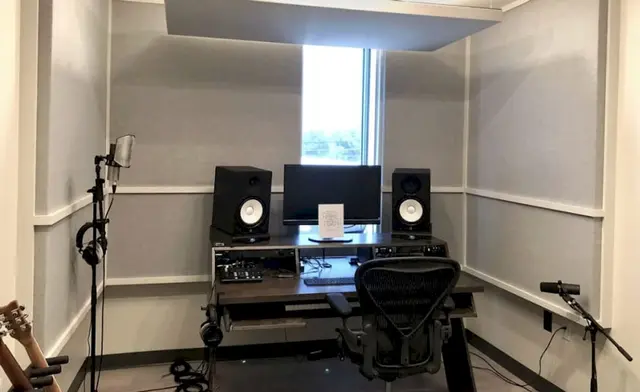
If you want pro-sounding dope rap vocals without draining your bank account, start with a decent audio interface, one solid mic, closed-back headphones, and basic room absorption. That’s the combo that moves the needle most for the least money, somewhere in the moderate budget range for a starter rig. Names like Reaper, Focusrite Scarlett, and the Audio-Technica AT2020 come up for a reason, but no single brand is mandatory to get a clean vocal.
Buying an interface, a basic mic, and closed-back headphones in the moderate budget range provides the most noticeable vocal quality improvements for beginners.
Room treatment, especially at first-reflection points and bass traps, offers more significant sound clarity gains than investing in high-end microphones or monitors.
Using stock DAW tools like EQ and compression effectively can dramatically enhance vocal tracks without additional plugin purchases.
Upgrading only after establishing a solid initial setup is more cost-effective than splurging on equipment first, with a focus on treatment and technique.
Outsourcing mixing and mastering is a budget-friendly alternative when room acoustics or technical skills limit the quality of home recordings.
Table of Contents
Three Home Studio Setups for Rappers on a Budget
You don’t need to guess your way through gear shopping. Pick the tier that matches your bank account right now, not the one you’re hoping to afford in six months.
Starter build. This is bedroom-studio survival mode, and it works better than most people expect.
USB audio interface (Focusrite Scarlett Solo, new or lightly used)
Audio-Technica AT2020 condenser mic
Closed-back headphones (budget studio pair, $40–$60)
Free DAW (Reaper’s trial or GarageBand on Mac)
A closet full of clothes or a couple of moving blankets for makeshift absorption.
You can record clean verses and hooks with this setup. It won’t compete with a commercial studio’s low end, but the vocal will sit clean enough to release.
Intermediate build. This is where you start hearing the difference on headphones and car speakers.
Focusrite Scarlett 2i2 (better preamps, cleaner gain)
Reaper license ($60, full version)
4 to 6 acoustic foam panels plus a reflection filter
Upgraded closed-back headphones and a starter pair of monitors
Capable build. Long-term investment territory. Add a second mic option (dynamic for aggressive deliveries), real bass traps, and a proper studio monitor pair for mixing decisions.
If money is tight, buy in this order: interface and headphones first, mic second, treatment third. That’s not just my opinion. It lines up with what Audient recommends for anyone building on a budget: get your interface, mic, and headphones locked in, then treat the room before you even think about monitors.
What Signal Chain Actually Means for Your Vocals
Your voice travels through a chain before it hits the speaker: mic, interface, computer, DAW, headphones or monitors. Weaken any link and the whole chain sounds off, no matter how hard you went in on the mic.
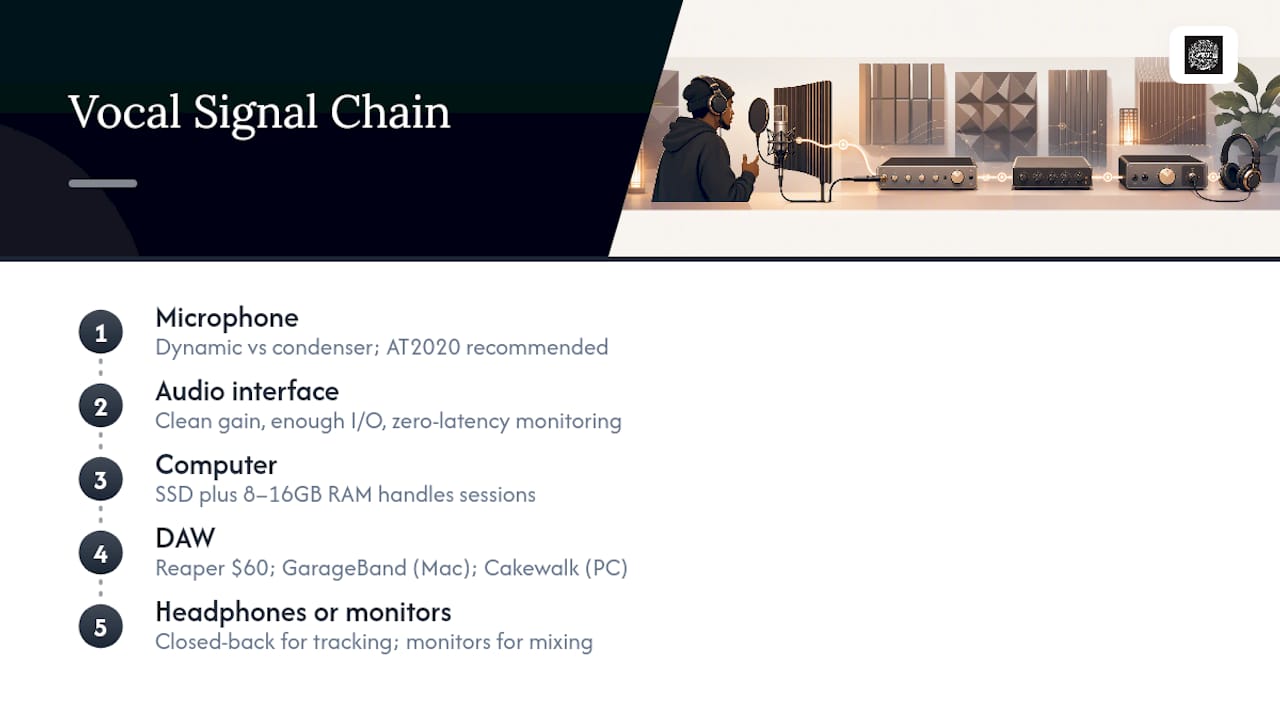
Your computer doesn’t need to be a beast. An SSD and 8 to 16GB of RAM handle most rap vocal sessions without hiccups. A laptop from the last five years with those specs runs Reaper or GarageBand fine.
The audio interface is where beginners underspend and regret it. Prioritize clean gain (no hiss when you push the input), enough I/O for your mic, and zero-latency direct monitoring so you can hear yourself without delay while tracking. The Focusrite Scarlett series shows up constantly in budget setups because it checks all three boxes without inflating the price.
Microphones split into two camps for rap vocals. Dynamic mics (like a Shure SM7B, though that’s a step-up in price) reject room noise and handle loud, aggressive delivery well, but need more gain. Condensers pick up more detail and air in the voice, which suits melodic hooks and cleaner deliveries, but they’re less forgiving of an untreated room. The AT2020 gets recommended across rapper-focused setup guides as a workhorse first mic. You grow into a specialty mic later.
Headphones vs. monitors comes down to purpose. Use closed-back headphones while recording (they isolate bleed and stop your headphone mix from leaking into the mic). Save monitors for mixing decisions once your room has some treatment, because monitors expose every flaw in an untreated space.
A quick reality check on cost: a full budget breakdown for a 2025 style setup lands between roughly $400 and $950 total, with interfaces and mics each running $100 to $250 and headphones $100 to $200. That range holds up whether you’re buying in 2026 or scrounging Craigslist listings.
On the DAW front: Reaper runs a personal license for $60, covers two major version upgrades, and does everything a paid DAW three times the price does. GarageBand is free on Mac. Cakewalk is free on PC. There’s no excuse to be recording into a phone voice memo app in 2026.
Room Treatment Beats a Fancy Mic Every Time
Here’s the truth nobody wants to hear when they’re eyeing a $1,000 mic: your room is lying to you before the mic even picks up your voice. Reflections off bare walls muddy the recording, and no amount of mic money fixes that. Room treatment isn’t soundproofing, either. Soundproofing keeps sound from leaving or entering a room; treatment controls how sound bounces around inside it. You need treatment far more than you need soundproofing, unless your neighbors are already banging on the wall.
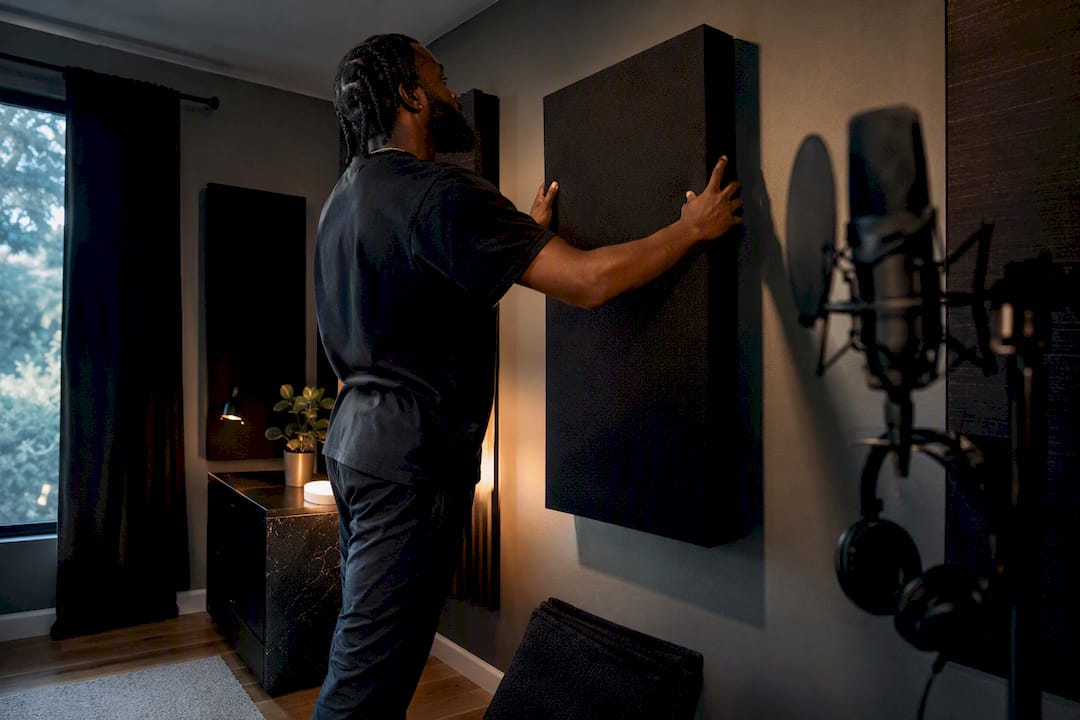
If you’re renting, start here. Door seals and a cheap draft stopper cut noise leakage more than people expect, and they come off clean when you move. Moving blankets hung over a closet door turn that closet into a makeshift vocal booth overnight.
Buy or build treatment in this order for the biggest return on investment:
First-reflection points on the walls beside and behind your mic position
A ceiling cloud directly above your recording spot
Corner bass traps to tame low-end buildup
Rear wall absorption to kill the slap-back echo
A basic 4-panel foam kit runs an affordable price online. DIY bass traps made from mineral wool and fabric run about the same if you’re handy. Partner resources like Jupiter AV’s guide on panel placement break down exactly how many panels a small room actually needs, which saves you from over-buying.
Pro Tip: Record the same 8 bars before and after you hang treatment. Play both back on your phone speaker. The difference will convince you faster than any spec sheet.
Mic Technique That Actually Fixes Your Sound
Technique is free. Most rappers skip it and blame the mic instead.
Keep 4 to 6 inches of distance for aggressive, loud bars to avoid the proximity effect making your low end boom and distort.
Pull back to 8 to 10 inches for softer, melodic deliveries where you want more natural tone.
Angle slightly off-axis (not dead center into the capsule) to reduce plosives and harsh S sounds without killing clarity.
Run a pop filter and shock mount every session. No exceptions. A low-cost pop filter saves hours of cleanup later.
Use a portable isolation shield behind the mic if you’re tracking near a hard wall.
Set your gain so your loudest bar peaks around negative 6dB, leaving headroom for when you get hyped mid-take. Track with direct monitoring through your interface so you’re not fighting latency while trying to stay in the pocket. Name your takes clearly (verse1_take3, not “new recording 47”), comp your best lines across takes, and always run a quick playback check before you call the session done.
Software and Plugins Worth Learning First
You don’t need a plugin folder full of $200 purchases to sound finished. Learn your DAW’s stock tools first.
Reaper, GarageBand, and Cakewalk all ship with usable stock EQ, compression, and reverb.
Master EQ before anything else. It’s the tool that fixes muddy or thin vocals fastest.
Learn compression second, since it’s what makes a vocal sit consistently loud in the mix.
Add a de-esser once your S sounds start poking through after EQ and compression.
Comparing stock plugins against third-party options generally lands on the same conclusion: beginners get more mileage from mastering what’s already in the DAW than from chasing plugin brand names.
A simple vocal chain to start with: gate (kills noise between lines) into EQ (cuts mud) into compression (evens dynamics) into a touch of reverb or delay for space. Export a rough bounce and check it in your car or on cheap earbuds before calling it done.
Buying Smart: Used Gear, Warranties, and Where to Splurge
Save money on the interface and mic by buying lightly used from reputable sellers. Splurge, if you splurge anywhere, on room treatment, since that’s what separates a demo from a release.
Before buying used gear, check these:
Test every input and output for noise or crackle with headphones on
Inspect connectors and cables for corrosion or bent pins
Confirm the return window before you pay, especially on marketplace deals
Ask the seller directly: “Why are you selling it?” and “Has it ever been dropped or exposed to moisture?”
Retail outlets often beat marketplace listings on warranty coverage, even when the sticker price runs a little higher.
Producer Tips That Beat Buying More Gear
I’ve been producing since 2007 and have experience with records placed in major productions. None of that happened because somebody had the priciest mic in the room.
The three cheapest upgrades that outperform a gear splurge: a $10 pop filter positioned correctly, a warm-up routine before you hit record, and a saved gain-staging preset so every session starts clean instead of guessing knobs from scratch.
Run a quick pre-session checklist every time: gain levels set, pop filter in place, headphones seated right, two throwaway test takes before the real one. Small rituals like that build consistency faster than any gear purchase.
Why I’ll Always Tell You to Record First, Upgrade Later
Stop waiting on the “right” mic to drop your verse. The starter build above gets you a clean, releasable vocal today, and today matters more than the gear you don’t have yet. Treatment plus technique beats an expensive mic in an untreated room, every single time. Go record something.
— IndepthJayBeats
When It Makes Sense to Outsource the Finish
Sometimes the smartest budget move isn’t more gear. It’s skipping the upgrade grind entirely and handing the finishing work to someone who’s already dialed in.
If your room still isn’t cooperating, or you just want a track that sounds radio-ready without buying a single extra panel, Indepthjaybeats offers online mixing and mastering packages built specifically for independent rappers working out of home setups. A clean mix from someone with production credits since 2007 can cover for a room you haven’t fully treated yet. On the instrumental side, Indepthjaybeats has trap beats and boom bap type beats ready to license, exclusive or non-exclusive, so you’re not burning studio time writing to a loop that doesn’t fit your sound. A free beat pack is available to give a taste of the sound before committing. Once you’ve got a verse recorded on your new setup, head over and browse the beat catalog to find the instrumental that finishes the job.
Sources
The difference between sound treatment and soundproofing - WhisperRoom blog
Affordable Home Studio Setup in 2025: Pro Sound Within a Budget
FAQ
What do I need for a home rap studio?
At minimum: a computer, an audio interface like the Focusrite Scarlett series, a mic such as the Audio-Technica AT2020, closed-back headphones, a DAW, and some basic room absorption.
How can I build a home studio on a budget?
Start with the interface, mic, and headphones combo first, then treat the room before you spend on monitors. A full budget breakdown for a 2025 style setup lands between roughly $400 and $950 total, depending on your choices.
How much does it cost to rap in a studio?
Commercial studio time varies widely by city and engineer, but building your own home setup within a budget range typically pays for itself within a handful of sessions compared to renting hourly.
What equipment is needed for a rap music studio?
An interface, a mic, headphones, a DAW like Reaper, and acoustic panels or DIY absorption cover the essentials. Everything past that, extra mics, monitors, hardware, is an upgrade, not a requirement.
Recommended

Get 20+ Free Beats delivered to your inbox
Drop your name and email and I'll send a pack to your inbox right away.
We respect your inbox, no spam. Promise!