
Mixing vocals in Audacity for free means applying industry-standard techniques like gain staging, equalization, compression, and reverb inside a digital audio workstation that costs nothing to download. Audacity is a free, open-source DAW capable of producing professional results when you follow the right workflow. The key is understanding that effect order matters more than the software brand. This guide walks you through every step, from setting up your session to exporting a polished stereo file ready for streaming.
How to mix vocals in Audacity for free: what you need first
Before you touch a single fader, your raw recording has to be solid. A bad recording cannot be fixed in the mix. No amount of EQ or reverb will save a clipped, noisy vocal track.
Proper gain staging during recording is the foundation of everything. Record with your peaks sitting between -12 dB and -6 dB. That range gives you enough signal without risking digital clipping, which permanently damages a track and cannot be repaired in post.
Here is what you need set up before you start mixing:
Audacity installed (free at audacityteam.org, works on Windows, Mac, and Linux)
Your raw vocal file saved as a WAV or AIFF, not MP3, to preserve audio quality
A backup copy of every raw file stored in a separate folder before you touch anything
Mono vocal track placed on its own track, separate from your instrumental
Mixer Board open via View > Mixer Board for visual level control across all tracks
Organize your session before you mix. Label each track clearly: “Lead Vocal,” “Instrumental,” “Harmony.” A messy session leads to messy decisions.
Setup Element | Recommended Setting |
|---|---|
Recording peak level | -12 dB to -6 dB |
File format | WAV or AIFF |
Vocal track type | Mono |
Session organization | Named, color-coded tracks |
Backup | Raw files in a separate folder |

How do you balance vocal levels and manage dynamics in Audacity?
Level balancing is the first thing you do after your session is organized. The goal is to make the vocal sit on top of the instrumental without fighting it.
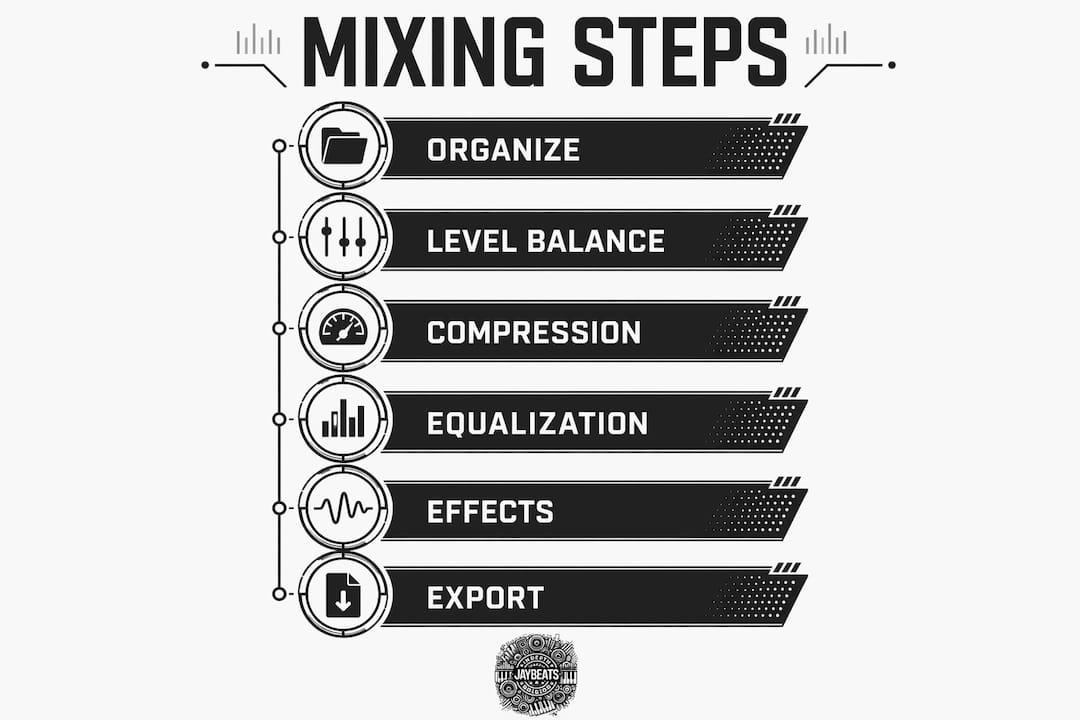
Use the Track Control Panel gain slider for quick adjustments on individual tracks. The Mixer Board gives you a broader view when you have multiple tracks running. Both tools do the same job. The Mixer Board just makes it easier to see everything at once.
The Envelope Tool is one of Audacity’s most underrated features for free vocal mixing techniques. It lets you draw volume automation directly onto a track. Use it to duck the instrumental slightly when the vocal comes in. This creates space without touching compression settings.
Envelope Tool shortcut: press F2 to activate it
Ducking target: pull the instrumental down by 3 dB to 6 dB during vocal phrases
Compression ratio for vocals: start at 2:1 and push to 4:1 for more aggressive control
Attack time: keep it slow enough to let the initial consonant of each word punch through
Pro Tip: Leave your final mix peaking between -3 dB and -6 dB. That headroom keeps your mix clean and gives a mastering engineer or limiter room to work without distortion.
Compression in Audacity lives under Effect > Compressor. Set your threshold where the loudest vocal peaks start hitting, then dial in your ratio. Start subtle. You can always add more later.
What are the best EQ techniques for vocals in Audacity?
EQ is where most beginners either fix the mix or wreck it. The goal is not to make the vocal sound good in isolation. The goal is to make it sit right inside the full track.
Start with a high-pass filter. Apply Effect > High Pass Filter and set the cutoff at 100 Hz to 120 Hz. This removes low-end rumble, room noise, and proximity effect buildup that muddies the mix. You will not miss those frequencies. The vocal does not live there.
Next, address harshness. Reducing around 3 dB in the 2.5 kHz to 4.5 kHz range cuts the harsh, nasal edge that makes vocals tiring to listen to. Use Audacity’s Graphic EQ or the Filter Curve EQ for this. A narrow cut in that zone makes a vocal sound smoother without losing presence.
Pro Tip: Always EQ your vocals with the instrumental playing in the background. EQing in context is the only way to catch frequency clashes between the vocal and the beat.
The 2 kHz to 5 kHz range is the most critical zone for vocal clarity and balance. Instead of boosting the vocal in that range, try cutting the same frequencies on the instrumental track. That approach creates space without making the vocal sound hyped or unnatural. Less boosting, more carving.
High-pass filter: 100 Hz to 120 Hz cutoff
Harshness cut: 3 dB reduction between 2.5 kHz and 4.5 kHz
Presence boost (optional): gentle lift around 5 kHz to 8 kHz for air and clarity
Low-mid cleanup: slight cut around 300 Hz to 400 Hz to reduce boxiness
Check your EQ decisions on headphones and speakers. What sounds right on headphones sometimes sounds thin on speakers. Test both before you commit.
How do you apply compression, reverb, and delay in Audacity?
Effect order is everything. The standard vocal chain runs noise reduction first, then EQ, then compression, then reverb and delay at the end. Skipping steps or reversing them creates problems you cannot easily undo.
In Audacity, apply effects in this exact sequence:
Noise Reduction (Effect > Noise Reduction): capture a noise profile from a silent section of the recording, then apply it to the full track
EQ (Effect > Filter Curve EQ): high-pass and midrange adjustments as covered above
Compression (Effect > Compressor): ratio between 2:1 and 4:1, threshold set to where peaks begin
Reverb (Effect > Reverb): apply to a duplicate track or use Audacity’s send-style workflow
For reverb, subtlety is the rule. More effects do not equal better sound. A reverb that is barely perceptible blends naturally. A reverb you can clearly hear usually means you have too much of it.
Set your reverb pre-delay between 15 ms and 30 ms. That short gap between the dry vocal and the reverb tail keeps the vocal intelligible. Without pre-delay, the reverb smears the attack of each word and the vocal loses definition in the mix.
Audacity does not have a traditional send/return routing system like a full DAW. The workaround is to duplicate your vocal track, apply reverb only to the duplicate, and then blend the two tracks together. Using a send-style approach for reverb keeps your dry vocal clean and gives you control over how much wet signal you hear.
One critical warning: Audacity is a destructive editor. Always back up your raw files before applying any effect. Once you save and close the project after applying effects, there is no going back. Work on copies, not originals.
How do you finalize and export your vocal mix in Audacity?
Once your effects chain is locked in, it is time to render and export. Go to Tracks > Mix > Mix and Render to New Track. This collapses all your tracks into a single stereo file you can review and export.
Lead vocals should peak between -3 dB and -6 dB in the final mix. Check your levels in the playback meter before exporting. If anything is clipping, pull the master gain down before you render.
Streaming platforms have loudness targets you need to hit. YouTube recommends around -14 LUFS. Podcasts typically target -16 LUFS. Audacity’s Normalize effect (Effect > Normalize) gets you close, but a limiter plugin gives you tighter control over the ceiling. Set your true peak limit to -1 dBTP to avoid inter-sample clipping on streaming platforms.
Common mistakes to fix before you export:
Clipping: if the meter hits red, pull the gain down and re-render
Over-compression: if the vocal sounds flat and lifeless, reduce the compression ratio or raise the threshold
Reverb wash: if the vocal sounds distant or blurry, reduce the reverb wet level and increase pre-delay
Frequency clashes: if the vocal disappears when the beat drops in, revisit your EQ cuts on the instrumental
Mixing Action | Audacity Tool |
|---|---|
Combine all tracks | Tracks > Mix > Mix and Render |
Set final peak level | Track gain slider or Normalize |
Control loudness ceiling | Limiter plugin or Normalize |
Check for clipping | Playback meter |
Export final file | File > Export > Export as WAV or MP3 |
Export as WAV for the highest quality master file. Export as MP3 only for distribution or sharing, and set the bitrate to at least 320 kbps.
Key Takeaways
Mixing vocals in Audacity for free produces professional results when you follow the correct effect order, maintain proper gain staging, and apply effects with restraint.
Point | Details |
|---|---|
Gain staging first | Record peaks between -12 dB and -6 dB to avoid clipping before mixing begins. |
Effect order is law | Run noise reduction, EQ, compression, then reverb in that exact sequence every time. |
EQ in context | Always EQ vocals with the instrumental playing to catch frequency conflicts early. |
Subtlety wins | Keep reverb barely audible and compression ratios between 2:1 and 4:1 for clean results. |
Hit loudness targets | Aim for -14 LUFS for streaming and keep final peaks between -3 dB and -6 dB. |
What I’ve learned mixing vocals on free tools since 2004
I have been producing since 2004, and I will tell you straight: the biggest mistake I see from artists mixing their own vocals is overloading the chain. They hear a problem, add an effect. Hear another problem, add another effect. By the end, the vocal sounds like it is buried under a blanket. Less is almost always more.
The second thing I see is people EQing in solo mode. They solo the vocal, tweak until it sounds good alone, then drop it back in the mix and wonder why it disappears. You have to mix raw vocals with everything playing. That is the only real test.
Free tools like Audacity are not a limitation. They are a discipline. When you cannot rely on expensive plugins to cover up bad decisions, you are forced to get the fundamentals right. That discipline carries over when you eventually move to a paid DAW. The artists I have worked with who came up on free tools tend to have sharper ears because they had to listen harder.
My personal workflow hack: after I finish a mix, I listen to it on my phone speaker, in my car, and on earbuds before I call it done. If it sounds good on all three, it is ready. If it falls apart on the phone speaker, the low mids are probably too heavy. That test costs nothing and saves you from releasing a mix that sounds great only in your studio.
— Indepthjaybeats
What Indepthjaybeats offers beyond the free tools
You have the workflow. Now you need beats worth mixing over.

Indepthjaybeats has been building beats for independent artists since 2007 with placements in WWE 2K25 and Love And Hip Hop Atlanta. Every track is built with vocal space in mind, so your mix sits right without fighting the instrumental. Whether you need hard trap instrumentals for your next single or exclusive rap beats for a full project, the catalog is ready. If you want a professional to handle the final mix and master, the online mixing and mastering service takes your Audacity session to a release-ready level. Grab a free beat pack and hear the difference a well-produced instrumental makes.
FAQ
Can Audacity produce professional-sounding vocals?
Yes. Audacity produces professional results when you follow the correct effect order and maintain proper gain staging throughout the session.
What compression ratio should I use for vocals in Audacity?
Start at a 2:1 ratio and increase to 4:1 for more dynamic control. Ratios above 4:1 risk over-compression and a flat, lifeless vocal sound.
What LUFS target should I aim for when mixing for streaming?
YouTube recommends -14 LUFS and podcasts typically target -16 LUFS. Use Audacity’s Normalize effect or a limiter to hit these targets before export.
Why does my vocal disappear when the beat drops in?
Frequency clashes between the vocal and the instrumental cause this. Cut competing frequencies on the instrumental track in the 2 kHz to 5 kHz range rather than boosting the vocal.
Is Audacity safe to use for final mixes?
Audacity is safe but destructive. Always keep a backup of your raw files before applying effects, since changes become permanent once you save and close the project.
Recommended

Get 20+ Free Beats delivered to your inbox
Drop your name and email and I'll send a pack to your inbox right away.
We respect your inbox, no spam. Promise!