Send your engineer a lossless stereo WAV or AIFF at your session’s native sample rate, 24-bit minimum (32-bit float if your DAW supports it), with peaks sitting between -6 dBFS and -3 dBFS and no brickwall limiter on the master bus. That’s the short version. Here’s the full checklist so you can package everything right the first time:
Stereo mix (unlimited): WAV or AIFF, 24-bit or 32-bit float, session sample rate (44.1 kHz or 48 kHz), peaks at -6 dBFS to -3 dBFS, no limiter.
Reference mix (limited): Same format, with your limiter on, so the engineer hears your intended loudness.
Stems or multitracks: Grouped stems (DRUMS, VOCALS, BASS, KEYS, FX) or individual tracks, all starting at bar 1 beat 1, same length.
Dry versions: Unprocessed alternatives for any heavily effected tracks (heavy reverb, distortion, extreme compression).
Session file (if requested): Full DAW project with plugin list and versions.
Reference tracks: One or two commercial songs that match your target vibe and loudness.
Notes file: BPM, key, DAW/OS version, plugin details, and a short creative brief.
Label everything clearly. Zip per song. Run a listening check outside your DAW before you upload. That’s what files to send for mixing and mastering, period.
Table of Contents
What export settings does your mastering engineer actually need?
What should you send for mixing: multitracks, stems, or session files?
How should you name files and organize your delivery folder?
Ready to send your files? Indepthjaybeats handles the mix and master
What export settings does your mastering engineer actually need?
Professional mastering engineers work exclusively with uncompressed audio. WAV and AIFF are the standard. MP3, AAC, and OGG are off the table, no exceptions, because lossy compression bakes in artifacts that mastering processing will only amplify.
Format and bit depth:
WAV or AIFF only. No lossy formats.
24-bit is the minimum; 32-bit float is preferred when your DAW supports it because it preserves headroom above 0 dBFS and protects transient data.
Match your session’s native sample rate — 44.1 kHz or 48 kHz. Don’t upsample or downsample before sending. Unnecessary conversion degrades quality and forces the engineer to resample again.
Headroom and levels:
Keep your stereo mix peaks between -6 dBFS and -3 dBFS. That gap is where the mastering engineer works. A mix hitting 0 dBFS with a slammed limiter leaves them nothing to grab onto.

When you’ve used a limiter on the master bus, export two versions: one unlimited (for mastering) and one limited (as a loudness reference). The unlimited version as 32-bit float is the safest move because it preserves every transient even if the mix was hot.
Target platform note: Drop a short text file listing your target platforms — streaming (Spotify, Apple Music), vinyl, or broadcast. Engineers use this to hit the right loudness standard (LUFS targets differ across platforms).
Understanding dynamic contrast is part of why headroom matters so much. A master with room to breathe translates better across every playback system.
What should you send for mixing: multitracks, stems, or session files?
This is where most artists get confused. The answer depends on what your engineer asks for, so ask first.
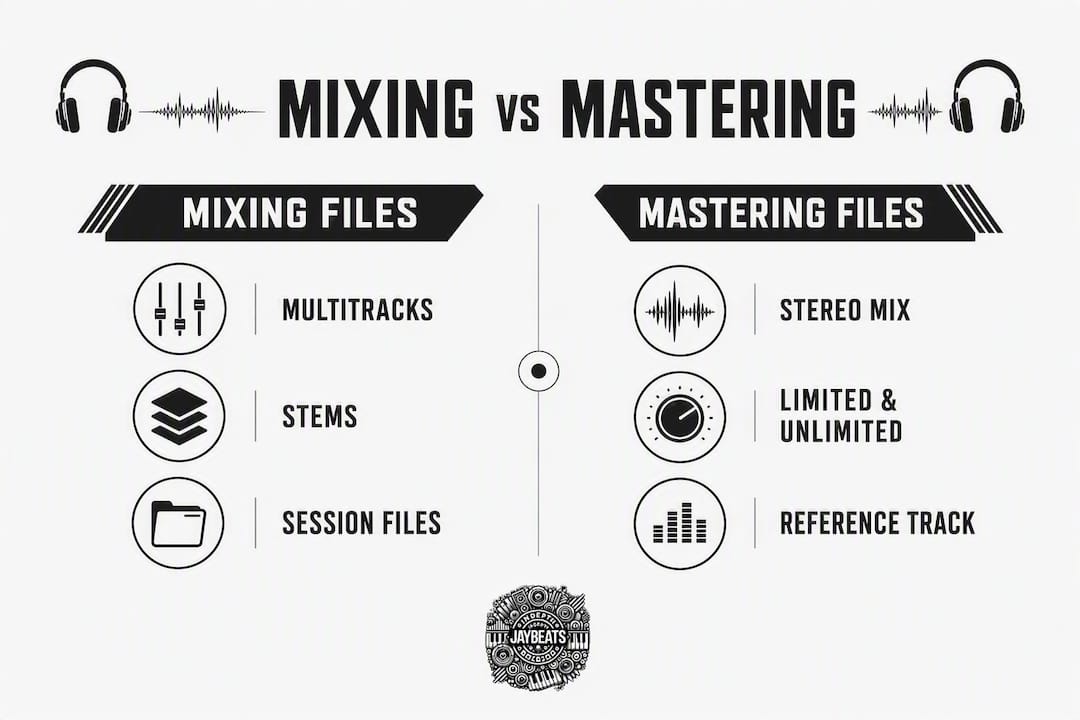
Multitracks vs. stems:
Multitracks are every individual recorded track in your session — every vocal take, every drum hit, every synth layer. Stems are grouped buses: DRUMS, VOCALS, BASS, KEYS, FX. Confirm which format your engineer wants before you export — sending the wrong type adds cost and time to the project.
Export rules (non-negotiable):
Render all tracks at your session’s sample rate and bit depth (24-bit or 32-bit float).
All files must start at the same time point — bar 1, beat 1 — and be the same length. Silence at the start is fine. Misaligned stems are one of the most common problems engineers deal with.
Export mono tracks as mono files. Export stereo tracks as stereo. Label L/R if you’re splitting stereo.
Include DI (direct input) versions for guitars and basses so the engineer can re-amp or reprocess tone if needed.
For heavily processed tracks — 808s with extreme saturation, vocals with thick reverb — always include a dry version alongside the processed one.
Stems breakdown for rap and trap:
DRUMS stem: kick, snare, hi-hats, percussion printed together.
VOCALS stem: lead vocal comp, ad-libs, and harmonies as separate files.
BASS stem: 808, sub, or bass guitar.
KEYS/SYNTHS stem: melodic elements grouped.
FX stem: reverb returns, delay sends, atmosphere layers printed separately.
If your sidechain or reverb send is critical to the feel of the track, print those as separate aux stems. Give the engineer both a dry and a wet version so they have options. Check out the stems guide for rap vocals for a deeper breakdown on organizing vocal layers specifically.
How should you name files and organize your delivery folder?
Bad naming wastes everyone’s time. Good naming gets your session opened and loaded in minutes.
Folder structure:
ProjectName_MASTERFILES— stereo mix files (unlimited + limited)ProjectName_STEMS— all stem or multitrack exportsProjectName_SESSION— DAW project file (if requested)ProjectName_REFERENCES— commercial reference tracksProjectName_NOTES— notes.txt and any tempo/key files
File naming examples:
TrackTitle_Voc_Lead_v1.wavTrackTitle_Drums_Stem_v1.wavTrackTitle_808_Bass_Dry_v1.wavTrackTitle_MIX_Unlimited_24bit_48k.wav
No spaces. No special characters. No vague names like “final_FINAL2_useThis.wav.” Version numbers keep revisions straight.
Your notes.txt should include:
BPM and key
DAW name and version, OS
Plugin list for any unusual processing
Brief creative direction (what to push, what to pull back)
Target platforms and any loudness preferences
Use cloud transfer services like Dropbox, Google Drive, or WeTransfer. Zip each song folder before uploading to preserve the folder structure. Uploading loose files without zipping causes platforms to flatten everything into one messy directory.
After export, listen to every file outside your DAW — in your car, on phone earbuds, anywhere that isn’t your studio monitors. Buffer underruns, clicks, and bad renders are invisible in the session view but obvious on playback.

Pro Tip: Drop a short manifest.txt in the root folder listing every file, its role (mix/stem/dry/reference), and the version number. Engineers open that first and it saves back-and-forth emails.
What mistakes slow down your mix and master session?
These are the errors engineers see constantly. Each one costs time or money.
Sending MP3s or low-bit files. Always export WAV or AIFF. No exceptions.
Slammed masters at 0 dBFS. If your mix is already limited and clipping, the mastering engineer has nothing to work with. Pull the limiter off before you export.
Misaligned stems. Every stem must start at the same timecode. A drum stem that starts two bars late breaks the entire import.
Missing tempo and key info. Without BPM and key, the engineer is guessing. Include a tempo map or at minimum a notes file.
Baked-in heavy effects with no dry alternative. Heavy reverb and extreme compression can’t be undone. Always supply a dry version of any track with processing you might want to revisit.
Uploading loose files without zipping. Cloud platforms often flatten folder structures. Zip per song, always.
“Pro results start at the source — send tracks that are plug-and-play ready instead of expecting the engineer to fix basic editing or tuning.” Sending a clean, organized session is the single fastest way to get a better mix back.
The red flag that derails sessions most often: mismatched sample rates or bit depths across stems. When stems don’t match the session specs, the engineer has to resample everything before mixing even starts. Match your session settings across every single export.
Producer pro tips from Indepthjaybeats before you hit send
Here’s the pre-send checklist used before any session goes out:
QA listen outside the DAW. Play every rendered file on a different system before uploading. Catch the clicks and dropouts before the engineer does.
Consolidate and trim. Remove unnecessary silence at the end of stems. Keep the start point consistent at bar 1.
Export dry and wet. For every heavily processed track — 808s, lead vocals, any effect-heavy layer — include both versions.
Include a tempo map. Even a simple notes.txt with BPM and key saves confusion. For complex arrangements with tempo changes, export a MIDI tempo map from your DAW.
Document your plugins. If you used a specific compressor or saturator that shapes the tone, note it. Engineers need to know what’s baked in.
Genre-specific notes for hip-hop and trap: 808 phase alignment matters. Before sending, check that your 808 and kick aren’t canceling each other out — mono-check your low end in your DAW. For boom bap, vocal comping should be tight before the session leaves your hands. Don’t send a rough comp and expect the mix engineer to clean it up. Check the trap beat mixing best practices guide for a deeper look at low-end prep.
When a limiter was used on the master bus, always export both a limited reference and an unlimited master file. The unlimited version as 32-bit float preserves every transient and gives the mastering engineer full headroom to work with.
Pack one reference track that matches your target vibe and perceived loudness. Label it clearly — note whether it’s a tonal reference (for sound character) or a loudness reference (for level target). Both serve different purposes.
Pro Tip: When sending rap vocal stems, include a vocal-up render (+3 dB) and a vocal-down render (-3 dB) alongside the standard mix. It speeds up revision rounds significantly because the engineer can dial in the vocal balance without waiting on a new export from you.
Key Takeaways
Send WAV or AIFF at 24-bit (or 32-bit float), session sample rate, with peaks at -6 dBFS to -3 dBFS, organized stems, dry versions of processed tracks, tempo/key info, and a reference track — zipped, labeled, and QA-checked before upload.
Point | Details |
|---|---|
File format and bit depth | Send WAV or AIFF at 24-bit minimum (32-bit float preferred); never send MP3 or lossy formats. |
Headroom for mastering | Keep stereo mix peaks between -6 dBFS and -3 dBFS; remove brickwall limiters before export. |
Stems alignment | All stems must start at bar 1 beat 1 and be identical in length to avoid import errors. |
Naming and packaging | Use consistent filenames with no spaces, version numbers, and zip each song folder before uploading. |
Indepthjaybeats workflow | Indepthjaybeats requests stereo WAV (24-bit/48 kHz), organized stems, tempo/key notes, and a reference track to start mixing and mastering. |
Why file prep is the move that separates serious artists from the rest
Most artists think the engineer’s job starts when they hit play on the session. It doesn’t. It starts the moment they open your folder. A bad stem import — misaligned files, missing dry versions, no tempo info — can burn through hours before a single fader moves. That’s your budget going toward technical rescue instead of creative work.
Prep is not busywork. It’s the difference between an engineer who’s excited to work on your record and one who’s frustrated before the mix even starts. When your session is tight, labeled, and ready to load, the engineer spends their energy on the sound, not the setup. That’s where the money goes. That’s where the record gets made.
The artists who consistently get great mixes back aren’t always the ones with the best recordings. They’re the ones who send clean, organized sessions that let the engineer do their job. Build that habit now.
Ready to send your files? Indepthjaybeats handles the mix and master
Indepthjaybeats has been building records since 2007, with placements in WWE 2K25 and Love and Hip Hop Atlanta. The mixing and mastering service is built specifically for rappers and producers who want a professional result without the back-and-forth of a traditional studio setup.

To get started fast, send a stereo WAV (24-bit, 48 kHz), your stems or multitracks as contracted, a notes file with BPM and key, and one reference track. That’s all it takes to kick off the session. If you need beats to record over before you even get to the mix stage, the full catalog of hip hop instrumentals is ready to license right now.
Head to the mixing and mastering page to check current turnaround times and pricing tiers, then upload your files directly through the portal.
Useful sources and further reading
The guides below go deeper on specific parts of the prep process. If your engineer gives you specs that differ from this checklist, follow their specs — they know their workflow.
The Complete Guide to Preparing and Exporting Your Track for Professional Mixing — detailed walkthrough of stem export settings, MIDI tempo maps, and file format choices.
Mix Preparation and File Delivery for Mastering — covers headroom, dual-version exports, and QA listening outside the DAW.
Best Way to Send Music to Mastering Engineers — practical breakdown of peak levels and master bus prep.
Mix Prep Guide — alignment rules and stem start-point guidance.
Sending Mixes to Clients: A Step-by-Step Guide — covers review portals, batching, and version control for efficient approvals.
Indepthjaybeats Mixing and Mastering Services — file requirements and booking for rap and trap productions.
Stems for Mixing Rap Vocals — vocal stem organization and labeling for rap sessions.
Music Licensing for Film and TV — guidance on stem delivery requirements for TV and film placements.
Recommended
Online Mixing and Mastering Services for Rappers | IndepthJayBeats
Music Licensing for Film & TV: Complete Guide | InDepthJayBeats

Get 20+ Free Beats delivered to your inbox
Drop your name and email and I'll send a pack to your inbox right away.
We respect your inbox, no spam. Promise!