
Record Rap Vocals at Home With Pro Sound Quality
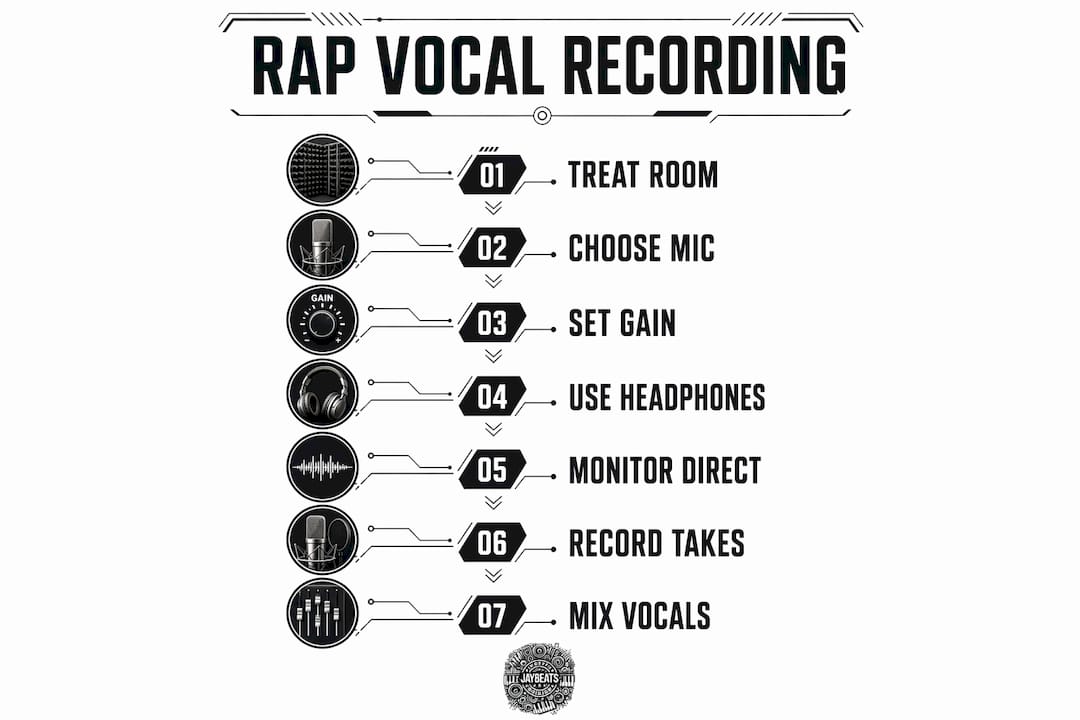
You don’t need a $10,000 studio to sound professional. A treated small space, proper gain staging, closed-back headphones, and short tracking passes through a basic vocal chain will get you there. That’s the whole game. Here’s how to execute it.
Quick-start checklist:
Where to record: Step inside a walk-in closet or hang moving blankets around a corner. Clothes and soft surfaces kill reflections fast.
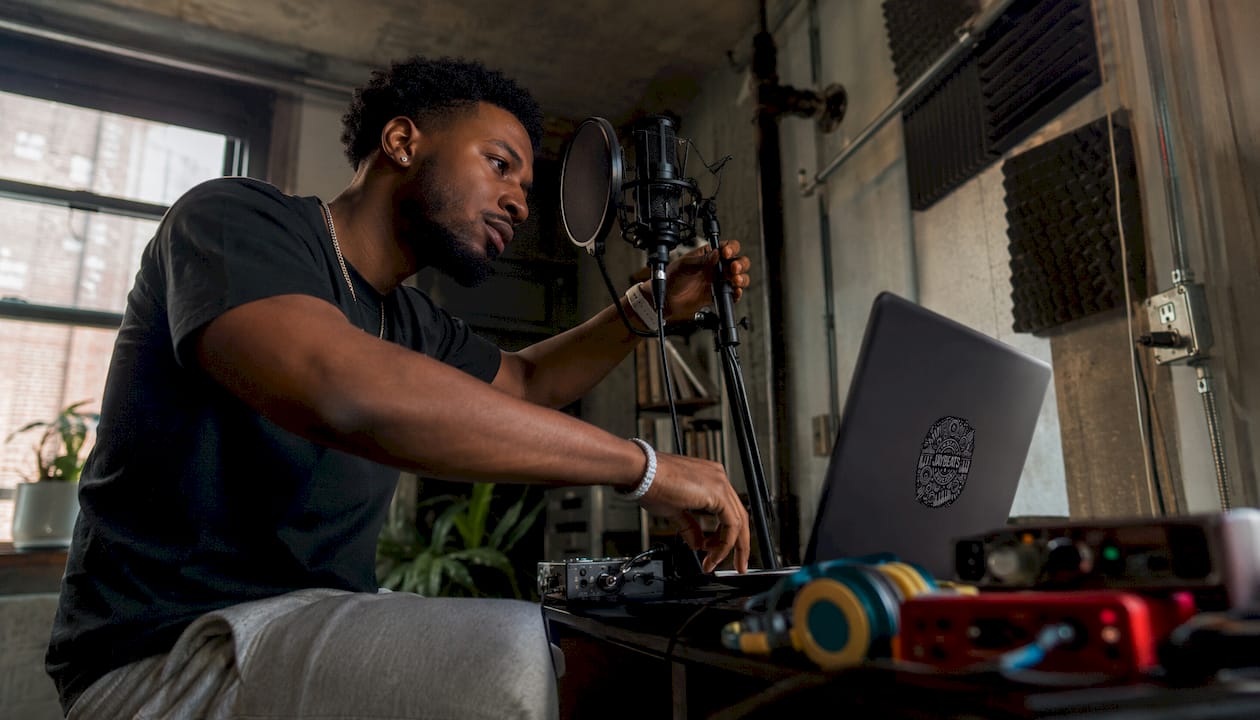
Monitoring: Use closed-back headphones and flip on direct monitoring at your interface so you hear yourself with zero latency.
Gain target: Set your interface gain so the loudest peaks land between −18 and −12 dBFS. Never record hot.
Mic distance: Stand an appropriate distance from the mic with a pop filter placed in front of the capsule.
Track in pieces: Record 4–8 bars at a time, then comp the best takes into one clean performance.
Buy this first, delay that: Room treatment and closed-back headphones come before anything else. A $30 moving blanket does more for your sound than a $300 mic upgrade in a bare room. After the room is handled, grab a mic and interface. Monitors, shock mounts, and acoustic panels can wait.
Indepthjaybeats has been building beats and coaching artists through this exact process since 2004. Every setting in this guide is field-tested, not theoretical.
Table of Contents
What gear do you actually need to start recording rap vocals?
How do mic placement and tracking workflow affect your sound?
How do you set up monitoring and your DAW for smooth vocal tracking?
How do you prepare your voice and performance before recording?
How do you fix background noise, clipping, and room reverb fast?
How do you protect your voice through a long recording session?
How do you configure your audio interface and DAW step by step?
What file formats should you use and how do you back up your sessions?
What gear do you actually need to start recording rap vocals?
Gear decisions feel overwhelming until you have a clear priority order. Here it is:
Room treatment and closed-back headphones
Microphone
Audio interface
Cables, mic stand, and pop filter
Studio monitors (optional at the start)
USB vs. XLR: which should you choose?
USB mics plug straight into your laptop. No interface needed, no extra cables. That simplicity makes them the right call when you’re just starting out or recording on the go. The Audio-Technica ATR2100x and the Samson Q2U are the two best entry points here. Both are hybrid mics that work over USB and XLR, so you’re not locked in. Start USB, add an interface later, and the same mic keeps working.
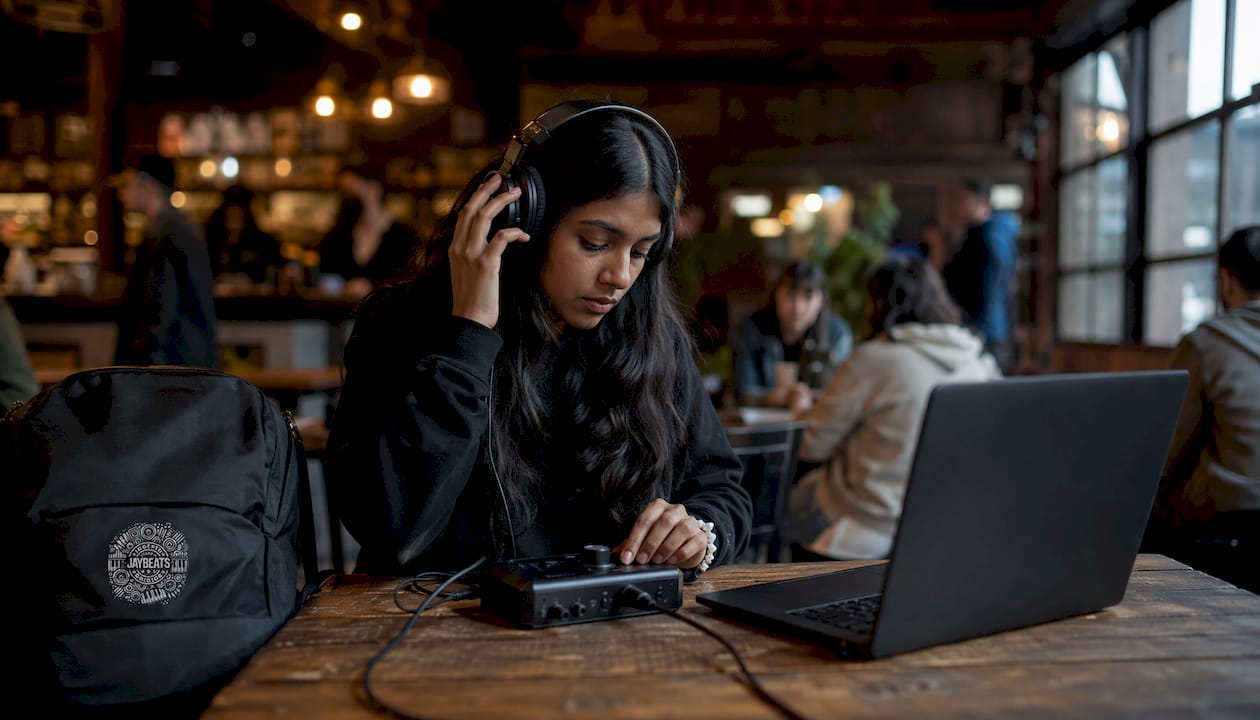
XLR mics need an audio interface to function, but they give you more control over gain, tone, and signal quality. Once you’re ready to step up, the Focusrite Scarlett 2i2 is the most reliable interface at the entry-to-mid price range. It’s clean, low-noise, and has direct monitoring built in.
Dynamic vs. condenser: match the mic to your room
Dynamic mics reject background noise better than condensers, which makes them the smarter pick for untreated rooms. The Shure SM7B is the gold standard here. It’s what a lot of major-label rap records were cut on, and it handles loud, close-mic delivery without flinching. The tradeoff is that it needs a strong preamp, so pair it with a Scarlett 2i2 and a Cloudlifter if your gain is running thin.
Condenser mics like the Rode NT1-A capture more detail and air, but they also pick up every creak, HVAC hum, and reflection in the room. Save the NT1-A for a treated space or a closet setup where the room is already controlled. Check out the mic options for rappers breakdown for a deeper look at how each mic type performs in different room conditions.
Budget tier comparison
Feature | Entry ($300–$500) | Mid ($700–$1,500) | Pro Home ($1,500+) |
|---|---|---|---|
Mic type | USB dynamic (ATR2100x, Q2U) | XLR condenser (NT1-A) | XLR condenser/dynamic (SM7B, NT1-A) |
Interface | None (USB direct) | Focusrite Scarlett 2i2 | Focusrite Scarlett 2i2 or higher |
Headphones | Closed-back budget (Sony MDR-7506) | Sony MDR-7506 or Audio-Technica ATH-M50x | ATH-M50x or calibrated set |
Treatment | Moving blankets, closet | Acoustic panels + bass traps | Full panel treatment + bass traps |
Noise rejection | High | Medium | High (with room treated) |
Detail/air capture | Medium | High | High |
Requires preamp | No | No | Yes (SM7B) |
DAW options: GarageBand is free on Mac and handles everything a beginner needs, including basic EQ, compression, and effects. Audacity is free on Windows and Mac, works well for tracking and basic editing, though its mixing tools are more limited. Both are solid starting points before you invest in a paid DAW.
Pro Tip: Pop filters and mic stands are not optional. A pop filter cuts plosives (“p” and “b” sounds) that no plugin fully fixes after the fact. A stable boom stand keeps your distance consistent take after take.
How do you treat a room for better rap vocal recordings?
Acoustic treatment is the highest-impact investment you can make for home recordings, and most of it costs less than a mic cable. The room shapes your sound before the signal even hits the interface.
The closet trick
Point your mic toward the interior of a walk-in closet with the door mostly closed. The hanging clothes act as broadband absorbers, killing early reflections and mid/high frequency buildup. This is the fastest free acoustic upgrade available. No foam, no panels, no construction.
DIY treatment that actually works
Moving blankets: Hang them behind and beside the mic to kill first reflections. Two blankets cost around $30 at a hardware store.
Rugs and carpet: Hard floors reflect sound upward into the mic. A thick rug under the recording position cuts that bounce.
Mattresses and couches: A mattress leaned against the wall behind the mic is genuinely effective broadband absorption.
Bookshelves with books: Irregular surfaces scatter sound rather than reflecting it cleanly. A full bookshelf behind the performer helps.
Corners: Bass frequencies build up in corners. Stuffing corners with pillows, bass traps, or even rolled blankets reduces low-end muddiness.
In rooms roughly 8–12 square meters, 20–30% wall coverage plus corner treatment can push RT60 below 0.5 seconds, which is the target for a room that translates well on other playback systems. You can verify changes with a simple clap test: clap once in the room and listen for how long the echo rings. A treated room sounds dead fast. An untreated room rings and flutters.
Room pre-check before every session:
Turn off HVAC, fans, and refrigerators near the recording space
Close windows and doors
Check for hard, reflective surfaces directly beside or behind the mic
Confirm no traffic or construction noise is bleeding through
Pro Tip: Don’t confuse soundproofing with acoustic treatment. Soundproofing keeps sound from entering or leaving the room — it requires construction. Treatment controls how sound behaves inside the room. You need treatment. Soundproofing is a bonus.
For a full room-setup walkthrough, the room setup guide for vocal recordings covers placement specifics in detail.
How do mic placement and tracking workflow affect your sound?
Getting the placement right before you hit record saves hours of editing later. These numbers are not suggestions.
Mic placement
Position the pop filter 6 inches from the mic capsule and stand 8–10 inches behind the pop filter. In a treated space or closet, condensers like the NT1-A work well at that distance. In a less-treated room, pull back slightly to 10–12 inches to reduce room pickup, or switch to a dynamic.
Angle the mic 10–15 degrees off-axis from your mouth. This cuts plosives further without losing presence. Never point the capsule directly at your lips.
Pro Tip: The proximity effect is real. The closer you get to a cardioid mic, the more bass you pick up. Use that intentionally for a warm, chest-heavy delivery on hooks. Back off for a cleaner, more articulate verse sound.
Gain staging
Target: Set your interface gain so the loudest vocal peaks land between −18 and −12 dBFS. This keeps headroom for plugins and prevents clipping.
Recording at −6 or −3 dBFS feels louder in the moment but destroys headroom and causes distortion when compression hits the signal. Set it right before you start, not after.
Step-by-step tracking workflow
Warm up your voice for 5–10 minutes before the first take (more on this below).
Set your headphone mix with the beat slightly louder than your voice so you lock into the rhythm.
Enable direct monitoring on your interface so you hear yourself in real time with no latency.
Check levels by rapping your loudest line into the mic. Confirm peaks are hitting −18 to −12 dBFS.
Record 4–8 bars at a time rather than full verses. Professionals track in short sections and comp the best takes together.
Label every take immediately (Take 1, Take 2, etc.) so comping is fast.
Use punch-in for lines that need a fix rather than re-recording the whole section.
Listen back on headphones after each pass to catch clipping, noise, or timing issues before moving on.
File settings: Record at 24-bit/48kHz. That’s the standard for rap production. 32-bit float is fine if your DAW supports it, but 24-bit/48kHz is what most mixing engineers expect when you send stems. Higher sample rates (96kHz, 192kHz) add file size without audible benefit for vocal recordings.
How do you set up monitoring and your DAW for smooth vocal tracking?
Latency kills performances. If you’re hearing yourself a half-second late in the headphones, your timing falls apart. Fix this before you record a single bar.
Closed-back headphones are non-negotiable
Open-back headphones and studio monitors bleed playback into the mic. Always track with closed-back headphones to prevent the beat from being captured in the vocal recording. The Sony MDR-7506 and Audio-Technica ATH-M50x are the two most reliable options at the entry-to-mid range. Both are closed-back, accurate enough for tracking and rough mixing, and available for under $150.
Direct monitoring vs. software monitoring
Direct monitoring routes your input signal directly to your headphones before it hits the DAW, which means zero perceived latency. Enable it on the Focusrite Scarlett 2i2 by pressing the Direct Monitor button on the front panel. Software monitoring runs the signal through the DAW first, which introduces latency even at low buffer settings. Use direct monitoring for tracking, every time.
DAW and buffer settings
Buffer size during tracking: Set to 64–128 samples. Lower buffers reduce latency but increase CPU load.
Buffer size during mixing: Raise to 512–1024 samples to give your CPU room to run plugins without dropout.
Audio driver: On Windows, use ASIO drivers (your interface’s dedicated driver, not the generic Windows driver). On Mac, Core Audio handles this automatically.
Sample rate: Match your DAW project to 48kHz to align with your recording settings.
Headphone calibration tools like SoundID Reference can improve how accurately your headphones represent the mix, which helps when you’re working entirely on headphones without monitors. It complements physical treatment rather than replacing it.
DAW template tip: Build a simple tracking template with one vocal channel (dry, no effects), one headphone send with a touch of reverb for comfort, and record arm already set. Save it. Open it every session. Consistency in setup means you spend time recording, not configuring.
What’s a practical mixing chain for rap vocals?
A clean recording chain gets you 80% of the way there. The mix chain handles the rest. Work through this in order.
The vocal processing chain
Noise gate or repair: Cut background noise and room bleed before anything else. Set the gate threshold just below the vocal floor.
Corrective EQ: High-pass filter at 80–100 Hz to remove low-end rumble. Cut any buildup around 200–400 Hz that makes the vocal sound boxy.
Compression: Start with a 4:1 ratio, attack around 10ms, release around 60ms. Aim for 4–6 dB of gain reduction on the loudest lines.
De-esser: Target the 5–10 kHz range where sibilance lives in rap vocals. Set the threshold so it only catches the harshest “s” and “sh” sounds, not every word.
Additive EQ: Boost presence around 3–5 kHz for clarity and cut-through. Add a gentle high-shelf boost above 10 kHz for air if the vocal sounds dull.
Saturation: A light pass of tape or tube saturation adds harmonic content and perceived loudness without turning up the fader. This is one of the fastest ways to make a vocal feel expensive.
Parallel compression: Send the vocal to a parallel bus with heavy compression (8:1 or higher), blend it low underneath the dry signal for punch and density.
Reverb and delay sends: Use sends, not inserts. A short room reverb (pre-delay 20–30ms, decay under 1.5s) places the vocal in a space. A quarter-note delay with 15–20% feedback adds depth on hooks without cluttering verses.
For a deeper look at plugin selection and signal chain setup, the home studio audio plugin guide covers how to organize your chain efficiently.
Mix placement checklist:
Set vocal level so it sits clearly above the beat without burying the 808 or kick
Use a reference track (a commercial rap record with a similar vibe) to compare loudness and tonal balance
Automate volume rides on lines that are inconsistent in energy
Pan ad-libs 20–30% left and right; keep the main vocal centered
Export a dry vocal stem and a wet (with effects) stem separately for the mixing engineer
Pro Tip: Print your vocal stems before you close the session. Export the dry vocal, the processed vocal, and the full mix. Label them with the song name and date. Future you will be grateful.
How do you prepare your voice and performance before recording?
The best mic in the world can’t fix a tired, cold, or dehydrated voice. Prep is part of the recording process.
Warm-up routine (10 minutes before tracking):
Lip trills and humming to loosen the vocal cords
Tongue twisters to sharpen articulation
Speak through your verses at half volume before rapping at full energy
Drink room-temperature water, not cold. Cold water tightens the throat.
Session timing: Keep tracking blocks to 45–90 minutes. After 90 minutes of hard rapping, vocal fatigue shows up in the takes whether you feel it or not. Take a 10-minute break every 45 minutes. Drink water during breaks, not during takes.
Studies on vocal performance consistently show that tracking in short sections maintains energy and consistency across takes. Four to eight bars at a time keeps every line hitting with the same intensity as the first.
Headphone mix for performance: Run your vocal slightly louder than the beat in the headphone mix. This helps you hear your own pitch and timing clearly, which tightens delivery and reduces the number of takes needed.
Consistency habits:
Mark a spot on the floor with tape so you return to the same mic distance every take
Keep ad-libs and doubles at the same distance as the main vocal to avoid tonal mismatch
Don’t hold the mic. Use a stand. Handheld mics create handling noise and inconsistent distance.
How do you fix background noise, clipping, and room reverb fast?
Problems happen. Here’s how to diagnose and fix them without losing the session.
Diagnostic checklist:
Is the noise constant (HVAC, fridge, computer fan)? That’s a room/environment issue.
Does the noise spike with movement? That’s handling noise or a cable issue.
Is the vocal distorting? Check your gain. If peaks are above −6 dBFS, you’re recording too hot.
Does the vocal sound washy or distant? The room is too live. Move to the closet or add more absorption.
Quick fixes by problem:
Clipping: Lower the interface gain until peaks sit at −18 to −12 dBFS. Re-record. Clipped audio cannot be fully repaired in post.
Room reverb: Move the mic and performer closer to absorptive surfaces. Record in the closet. A reflection shield behind the mic helps but doesn’t replace a treated room.
Background noise: Switch to a dynamic mic (SM7B or ATR2100x in dynamic mode). Use a noise gate set just below the vocal floor. AI-based noise-reduction tools can clean up light noise on recorded takes.
Sibilance: Reposition the mic 10–15 degrees off-axis. Add a pop filter. Apply a de-esser in the mix chain targeting 5–10 kHz.
Plosives: Move the pop filter closer to the mic (6 inches from the capsule). Angle the mic slightly upward so the performer’s breath passes below the capsule.
When to stop and fix the room: If every take sounds washed out regardless of mic position, stop recording and treat the room. No amount of post-processing fully recovers a reverberant recording. Fix it at the source.
Pro Tip: A portable reflection shield mounted behind the mic is a fast fix for a bad room, but it only treats the rear of the mic. The sound still bounces off the floor, ceiling, and side walls. The closet trick treats the performer from all sides. When in doubt, go to the closet.
For more on fixing common recording problems, the home recordings troubleshooting guide covers the most frequent issues rappers run into.
What does each budget level actually get you?
A functional home recording setup can be built for $300–$500. A professional-grade home studio runs $1,500 and up. Here’s what each tier delivers in practice.
Gear | Entry ($300–$500) | Mid ($700–$1,500) | Pro Home ($1,500+) |
|---|---|---|---|
Microphone | ATR2100x or Samson Q2U (~$100) | Rode NT1-A | Shure SM7B (~$400) |
Interface | None (USB direct) | Focusrite Scarlett 2i2 (~$200) | Focusrite Scarlett 2i2 or higher (~$200–$400) |
Headphones | Sony MDR-7506 (~$100) | Audio-Technica ATH-M50x (~$150) | ATH-M50x + SoundID Reference (~$300) |
Treatment | Moving blankets, closet (~$30–$50) | Acoustic panels + bass traps (~$150–$300) | Full panel + bass trap setup (~$400+) |
What each tier delivers:
Entry ($300–$500): Clean, usable rap vocals in a treated closet. Good enough to release. The limiting factor is the room, not the gear. Build this first, learn the workflow, then upgrade.
Mid ($700–$1,500): Noticeably more detail and air in the vocal. The NT1-A captures nuance that the ATR2100x misses. The Scarlett 2i2 gives you clean preamps and direct monitoring. This is the setup most independent artists work on long-term.
Pro home ($1,500+): The SM7B with a treated room and calibrated headphones produces recordings that sit in commercial mixes without heavy corrective work. The upgrade from mid to pro is mostly about the room and the monitoring chain, not just the mic.
After the starter setup, upgrade in this order: Room treatment first, then headphones, then mic, then interface. Mixing and mastering services are worth budgeting for once your recordings are clean. Sending polished stems to a mixing engineer costs less than buying gear that doesn’t fix the actual problem.
For a full breakdown of how to build each tier from scratch, the home studio budget guide for rappers walks through every purchase decision.
Producer-level workflow tips that most tutorials skip
These are the habits that separate recordings that sound like demos from recordings that sound like records.
Doubles and ad-libs: Record your main vocal first, then record a double immediately after. The double should be a slightly different performance, not a copy. Pan the double 20–30% to one side. Ad-libs go on their own track, panned opposite. Layer three or four ad-lib tracks and blend them low. That’s where the width and energy in commercial rap vocals comes from.
Reference mixes in session: Pull up a commercial track in your DAW and A/B your vocal against it constantly. Not to copy the sound, but to calibrate your ears. If your vocal sounds thin compared to the reference, you need more saturation or parallel compression. If it sounds muddy, you need more corrective EQ in the 200–400 Hz range.
Saturation for perceived loudness: A light pass of tape saturation adds harmonic content that makes a vocal feel louder without actually raising the fader. This is one of the most underused tricks in home recording. Plugins like Softube Tape or Waves J37 do this well.
Preparing stems for a mixing engineer: Export the dry vocal, the processed vocal (with your chain printed), and each layer (doubles, ad-libs) as separate files. Label everything clearly. A mixing engineer who receives organized stems works faster and charges less for revisions.
Pro Tip: Keep your performance raw. Technical polish is a tool, not the goal. The energy in the room when you’re rapping at 2 AM with the right beat playing is what makes a record feel real. Don’t let the technical setup kill the vibe. Get the levels right, hit record, and perform like nobody’s listening.
For more on mixing rap vocals over hard beats, the guide to mixing raw vocals over trap beats covers the specific challenges of working with loud 808-driven production.
How do you protect your voice through a long recording session?
Vocal health is a practical recording concern, not just a performance one. A blown-out voice means unusable takes and wasted session time.
Before the session:
Avoid dairy, alcohol, and caffeine for at least two hours before recording. All three affect vocal cord function.
Sleep matters more than any supplement. A rested voice records better.
Steam inhalation for 5–10 minutes before a long session loosens the cords and reduces strain.
During the session:
Sip room-temperature water every 15–20 minutes. Cold water constricts the throat.
Avoid whispering between takes. Whispering strains the cords more than speaking at normal volume.
If a line isn’t landing after three or four takes, move on and come back. Forcing a tired take produces a tired recording.
After the session:
Rest the voice for at least 30 minutes after a hard session before speaking normally.
Avoid loud environments immediately after recording.
Honey and warm water help soothe irritated cords after extended sessions.
Tracking blocks longer than 90 minutes consistently produce diminishing returns. The takes get worse, not better. Schedule sessions accordingly.
How do you configure your audio interface and DAW step by step?
This is the setup sequence that gets you from unboxed gear to a clean recording in under 30 minutes.
Audio interface setup
Install the driver from the manufacturer’s website before plugging in the interface. For the Focusrite Scarlett 2i2, download Focusrite Control from the Focusrite website.
Connect the interface to your computer via USB.
Plug your XLR mic into Input 1 on the interface.
Set the gain knob so your loudest vocal peaks land between −18 and −12 dBFS on the interface’s input meter.
Enable 48V phantom power if you’re using a condenser mic. Dynamic mics do not need it.
Enable direct monitoring by pressing the Direct Monitor button on the Scarlett 2i2.
Plug closed-back headphones into the headphone output on the interface.
DAW setup (GarageBand or Audacity)
GarageBand (Mac):
Open GarageBand and create a new project.
Go to GarageBand > Preferences > Audio/MIDI and set Input and Output to your interface (Scarlett 2i2).
Set the sample rate to 48kHz and buffer size to 128 samples for tracking.
Create a new Audio Track, set the input to Input 1 (your mic channel).
Enable monitoring on the track only if you’re using software monitoring. With direct monitoring on, leave track monitoring off to avoid double-signal.
Hit record.
Audacity (Mac/Windows):
Go to Edit > Preferences > Devices and set the recording device to your interface.
Set the project sample rate to 48000 Hz in the bottom toolbar.
Set recording channels to Mono (one mic, one channel).
Use the input level meter to confirm peaks are not hitting the red before recording.
Hit record.
For a deeper walkthrough of mixing in GarageBand after you’ve tracked, the GarageBand rap vocal mixing guide covers the full chain from raw vocal to finished mix.
What file formats should you use and how do you back up your sessions?
File format decisions affect both quality and compatibility. Get this right before you record a single take.
Recommended formats:
WAV (24-bit/48kHz): The standard for professional rap production. Uncompressed, widely compatible, and what mixing engineers expect. Use this for all recordings and exports.
AIFF: Apple’s equivalent of WAV. Same quality, slightly larger files. Fine for Mac-only workflows.
MP3: Never record in MP3. It’s a lossy format that degrades audio quality permanently. Use MP3 only for sharing rough mixes or reference files.
Backup strategy:
Rule of three: Keep three copies of every session. One on your recording computer, one on an external hard drive, one in cloud storage (Google Drive, Dropbox, or iCloud).
Back up after every session. Not weekly. After every session. A hard drive failure between sessions means losing everything recorded since the last backup.
Label sessions clearly: Use a consistent naming format like “ArtistName_SongTitle_Date_v1.” Vague names like “New Recording 3” make finding files a nightmare six months later.
Export stems immediately after tracking. Don’t wait until mixing. Export the dry vocal, the processed vocal, and each layer as separate WAV files and store them alongside the session file.
Cloud storage is the cheapest insurance available. A Dropbox or Google Drive subscription costs a few dollars a month and protects against hardware failure, theft, and accidental deletion.
Key Takeaways
A treated recording space, correct gain staging, and a simple vocal chain are the three moves that separate professional-sounding home recordings from amateur ones.
Point | Details |
|---|---|
Treat the room first | Moving blankets or a closet full of clothes reduce reflections more than any mic upgrade. |
Nail your gain staging | Set interface gain so loudest peaks land between −18 and −12 dBFS before touching any plugin. |
Use closed-back headphones and direct monitoring | Closed-back cans prevent bleed; direct monitoring eliminates latency during tracking. |
Track in short passes | Record 4–8 bars at a time and comp the best takes for consistent energy across the whole verse. |
Back up every session | Export WAV stems and save three copies: local, external drive, and cloud storage after every session. |
Indepthjaybeats next step | When your recordings are clean, send stems to Indepthjaybeats for professional mixing and mastering. |
The real talk on home recording
Most rappers waste money on gear before they fix the room. A $500 mic in a bare bedroom sounds worse than a $100 dynamic in a closet full of clothes. The room is the instrument. Get that right first, and everything else falls into place faster than you’d expect.
The technical side of this is learnable in a weekend. Gain staging, mic placement, direct monitoring, tracking in pieces — none of it is complicated once you’ve done it a few times. What takes longer is developing the ear to hear what’s wrong and know how to fix it. That comes from reps. Record constantly, listen critically, and compare your work against commercial records you respect.
The other thing nobody tells you: the energy in the room matters as much as the settings. Late-night sessions with the right beat playing and nothing to prove produce recordings that feel alive. Don’t let the technical setup become a barrier to performing. Get the levels right, hit record, and go.
Ready to take your vocals to the next level?
Once your recordings are clean and your stems are organized, the next move is getting them mixed by someone who’s been doing this since 2007. Indepthjaybeats offers mixing and mastering for rap vocals built specifically for independent artists. Send your stems, keep full control of your music, and get back a mix that sits in any playlist.

If you’re still building your catalog and need beats to record over, the trap beats catalog and boom bap instrumentals are ready to go. Every beat is production-ready, cleared for recording, and built for artists who take their craft seriously. Grab a free pack first and hear the quality before you commit to anything.
Useful sources
Building a home studio — Berklee Now: Berklee’s practical overview of home studio priorities, with emphasis on room acoustics as the first investment.
How to record vocals in a home studio — MusicProductionWiki: Covers gain staging targets, mic distance, pop filter placement, and closed-back headphone use in detail.
Home studio setup and room design — LordReverb: Room treatment guidance including RT60 targets, corner treatment, and measurement tools for small rooms.
Guide to recording and mixing rap vocals — Soundtrap Blog: Practical workflow guide covering tracking in short sections, comping, and basic mixing chain for rap vocals.
Choosing the best microphone for rap — Cedar Sound Studios: Explains dynamic vs. condenser mic selection based on room treatment level and vocal style.
Home recording studio setup — MusicProductionWiki: Budget tier guidance, direct monitoring explanation, and buffer size recommendations for tracking vs. mixing.
2026 home studio setup checklist — Sonarworks Blog: Covers headphone calibration tools like SoundID Reference and how they fit into modern headphone-based workflows.
Home studio audio plugin setup — Vector DSP: Practical guide to organizing your plugin chain and signal flow for home recording and mixing.