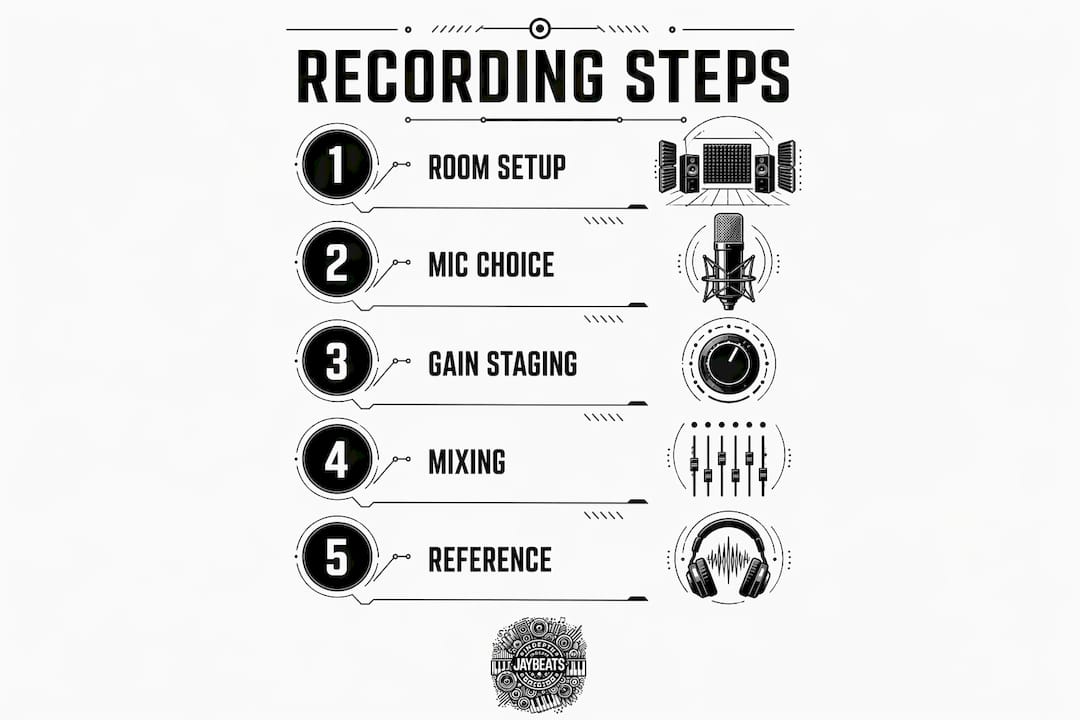
Professional home recording is defined as capturing audio at a quality level that meets industry standards for clarity, dynamic range, and frequency balance. Knowing how to make your home recordings sound more professional starts before you hit record. The fundamentals are room acoustics, microphone technique, gain staging, and mixing discipline. Get these right, and your tracks will hold up next to anything coming out of a commercial studio. Skip them, and no plugin in the world will save you.
How to set up your home recording environment for professional sound
80% of professional recording quality depends on the initial capture and room acoustics. That number should hit hard. It means your room matters more than your gear.
Most artists waste money on new mics and interfaces while recording in a bare room full of hard walls. The sound bounces everywhere, and you end up with a muddy, echo-soaked track that no amount of EQ can fix.
The good news is you do not need to spend thousands on acoustic panels. Here is what actually works:
Heavy blankets and moving pads hung on walls kill high-frequency reflections fast. Nail them at ear level where sound hits first.
Rugs and carpet on hard floors stop low-end buildup from bouncing up into your mic.
Upholstered furniture like couches and armchairs absorbs mid-range frequencies naturally.
Bookshelves filled with books scatter sound and break up standing waves without looking like a studio.
Corner bass traps are the most underrated fix. Room modes and bass buildup require targeted corner treatment for a balanced sound environment.
Room selection matters too. Smaller rooms with irregular shapes control reflections better than large square rooms. Avoid rooms with parallel walls when you can. A walk-in closet packed with clothes is genuinely one of the best vocal recording spaces you will find. The fabric absorbs sound from every direction.
Pro Tip: Record your voice in your closet with the door closed and clothes surrounding you on all sides. You will hear the difference immediately compared to an open room.
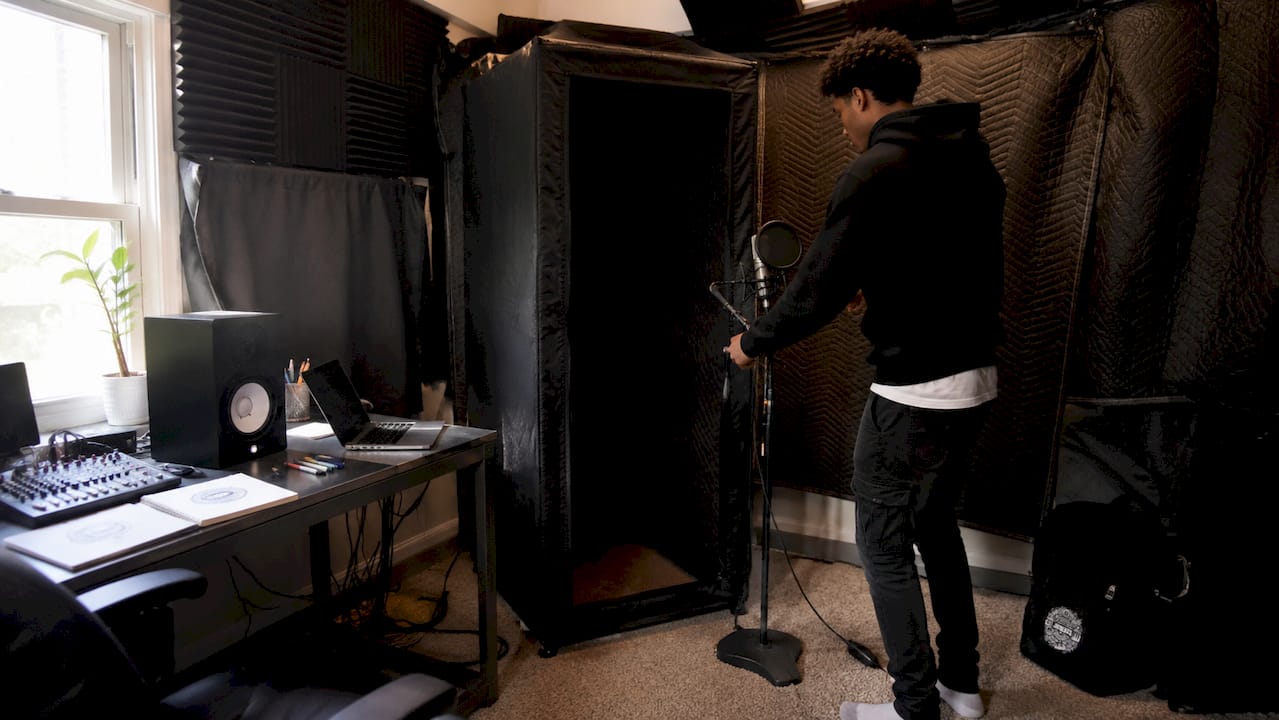
Panels under 2 inches thick are largely ineffective for low-end control. DIY solutions using thick blankets and furniture consistently outperform cheap foam panels sold at budget prices. Build your room treatment smart, not expensive.
What microphone type and position gives you the clearest sound?
Microphone choice and placement are the second biggest factors in clean home recordings. The wrong mic in the wrong position will ruin a great performance.
Condenser vs. dynamic microphones is the first decision you need to make. Condenser mics pick up more detail and a wider frequency range. They are ideal for vocals and acoustic instruments in a treated space. Dynamic mics reject more room noise and handle loud sources better. If your room is untreated, a dynamic mic will often give you a cleaner result than a condenser, even if the condenser costs more.
Mic positioning is where most artists go wrong. Here are the rules that actually work:
Position the mic 4–6 inches from your mouth for vocals. Placing a mic at this distance with basic acoustic treatment can reduce room echo by over 50%.
Angle the mic slightly off-axis, about 10–15 degrees to the side of your mouth. This reduces plosives (the “p” and “b” sounds that pop) without needing a pop filter alone.
Never record directly on-axis at close range without a pop filter. Plosives will destroy the low end of your recording.
Keep the mic away from reflective surfaces like desks, windows, and bare walls. Even 12 inches of distance from a hard surface makes a difference.
Pro Tip: Close mic positioning angled slightly off-axis reduces plosives and echo without needing expensive plugins. Test three different angles and listen back before committing to a full session.
A modest mic in a well-treated space will outperform an expensive mic in a bad room every single time. Prioritize your room and your technique before you spend money on a new microphone. Check out this breakdown of USB vs XLR mics if you are deciding between setups.
How does gain staging affect your recording quality?
Gain staging is the process of controlling signal levels at every point in your recording chain to keep the sound clean and undistorted. It is the most overlooked skill in home recording, and getting it wrong ruins tracks that could have been great.
Here is the correct process, step by step:
Set your input gain so peaks hit between -12dBFS and -6dBFS during the loudest parts of your performance. This is the recommended input level range for avoiding clipping while maintaining a strong signal.
Target an average recording level around -18dBFS. This gives you headroom to work with during mixing without the signal ever clipping.
Watch your meters in real time. If you see the meter hitting 0dBFS or going red, pull the gain back. Clipped audio is permanently damaged and cannot be fixed in post.
Record at 24-bit depth and 48kHz sample rate. This is the current professional standard for home studios in 2026. 24-bit depth provides 144dB of dynamic range compared to 96dB at 16-bit. That extra headroom gives you flexibility when you mix.
Never boost gain to compensate for a quiet performance. Record the performance again at the right level instead of cranking the input and introducing noise.
Recording at 24-bit depth lets you leave ample headroom without any audible penalty. You protect your dynamic range and keep your options open for processing later. Think of headroom like space in a room. The more you have, the more you can move around.
What mixing techniques make home recordings sound polished?
Mixing is where your raw recordings become a finished product. The goal is clarity, balance, and energy. Most artists either do too little or way too much.
Start with EQ before compression. On a raw vocal or instrument track, EQ first to remove problem frequencies, then compress to control dynamics. Applying compression to a muddy signal just makes the mud louder.
High-pass filtering is one of the most powerful tools you have. Apply a high-pass filter to every non-bass instrument in your mix. Cut everything below 80–100Hz on vocals, guitars, and synths. This removes low-end rumble and clears space for your kick and bass to breathe.
Over-processing, especially aggressive compression and noise reduction, drains the energy from recordings and makes them sound lifeless. Subtle dynamic control beats heavy tone reshaping every time. If you are reaching for a limiter early in your chain, pull back and ask why the signal needs that much control.
Reference professional tracks constantly. Pull up a song in the same genre that sounds the way you want your mix to sound. Referencing professional tracks trains your ears and gives you a real-world benchmark for every decision you make.
Pro Tip: Monitoring your mix in mono first ensures clarity and prevents phase issues before you apply stereo effects. If it sounds good in mono, it will sound great in stereo.
Mixing at low volumes prevents ear fatigue and leads to better frequency and dynamic balance decisions. Keep your monitors at a conversational volume level. Your ears stay accurate longer, and your decisions stay sharp. Check out these trap beat mixing practices for genre-specific guidance that applies directly to hip-hop and R&B production.
Key Takeaways
Professional home recordings require clean capture, treated rooms, correct gain levels, and disciplined mixing. No plugin replaces getting these fundamentals right from the start.
Point | Details |
|---|---|
Room acoustics come first | 80% of recording quality depends on capture and room treatment, not post-processing. |
Mic placement is technique | Position your mic 4–6 inches away and slightly off-axis to cut echo and plosives. |
Gain staging protects your signal | Record peaks at -12dBFS to -6dBFS and average around -18dBFS to avoid clipping. |
Record at 24-bit/48kHz | This standard gives you 144dB of dynamic range and full flexibility in the mix. |
Mix with restraint | Subtle EQ and compression preserve energy; over-processing kills the life in a track. |
What I have learned after years of producing from a home setup
Here is the real talk. When I started producing back in 2004, I thought buying better gear was the answer to everything. New mic, new interface, new monitors. The recordings still sounded amateur because the room was a problem I kept ignoring.
The shift happened when I stopped chasing equipment and started treating my space. A few thick blankets, some furniture rearrangement, and corner treatment changed everything. The gear I already had started sounding like a different studio.
Ear training is the other thing nobody talks about enough. You have to listen critically every single day. Reference tracks are not optional. They are the compass that keeps your mix pointed in the right direction. Without them, you are mixing in a vacuum and guessing.
The artists who place music in major productions are not always the ones with the best gear. They are the ones who understand their signal chain from the room to the master. They are patient, they iterate, and they never stop learning. That discipline is what separates a demo from a placement.
— Indepthjaybeats
Level up your recordings with Indepthjaybeats
Your room is treated. Your gain is set. Your mix is coming together. Now you need beats that match that level of quality.

Indepthjaybeats has been producing professional-grade trap and boom bap beats since 2004, with placements in WWE 2K25 and Love And Hip Hop Atlanta. These are not bedroom beats. They are production-ready instrumentals built for artists who take their craft seriously. Browse the full catalog of exclusive rap instrumentals and find the sound that fits your project. If you need your vocals polished on top of a beat, the mixing and mastering service is built specifically for independent rappers who want a professional result without a major-label budget.
FAQ
What is the most important factor in professional home recording?
Room acoustics and initial signal capture account for 80% of recording quality. No amount of mixing or post-processing compensates for a bad room or poor mic placement.
What recording settings should I use for professional sound?
Record at 24-bit depth and 48kHz sample rate. Set your input gain so peaks land between -12dBFS and -6dBFS, with an average level around -18dBFS.
Do I need an expensive microphone for professional results?
A modest microphone in a well-treated room outperforms an expensive mic in an untreated space. Fix your room acoustics before upgrading your mic.
How do I reduce echo in my home recordings?
Position your mic 4–6 inches from the source and angle it slightly off-axis. Add heavy blankets, rugs, and corner bass traps to your room to cut reflections by over 50%.
How loud should I mix my tracks?
Mix at low, conversational volume levels. High-volume monitoring causes ear fatigue, which leads to poor EQ and dynamic decisions that hurt the final mix.
Recommended

Get 20+ Free Beats delivered to your inbox
Drop your name and email and I'll send a pack to your inbox right away.
We respect your inbox, no spam. Promise!